EEG-Monitor with EDF recording functionality.
Network connection.
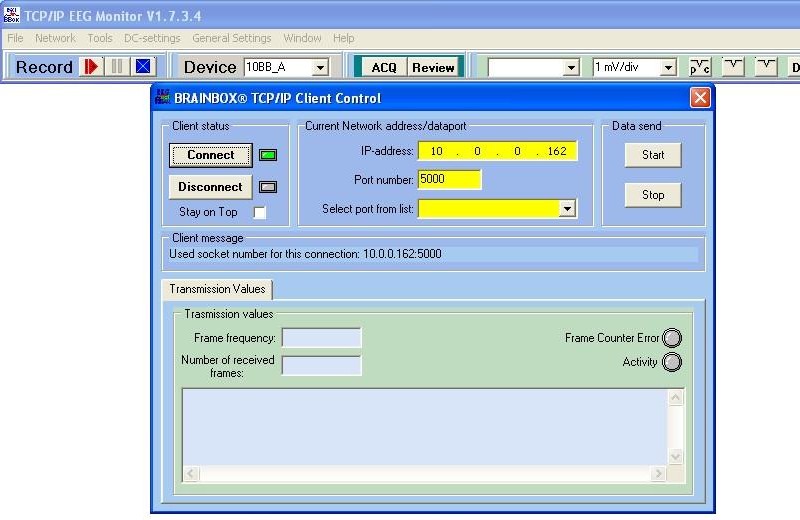
The EDF-version of the EEG-Monitor has special functions to recording the EEG-data to an EDF-formatted file. This version of the EEG-Monitor can be found on the download page. After downloading and installation of this EEG-Monitor software, the program can be start. First make connection to the BRAINBOX® hardware Amplifier via the main menu item 'NETWORK' In the case there is no hardware available, start-up first the virtual amplifier for the EEG-1042 (see the download page) and than make connection to this software component. Below the dialog is shown for making the connection. |
Patient ID and Recording ID.
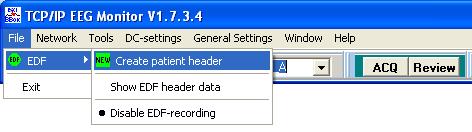
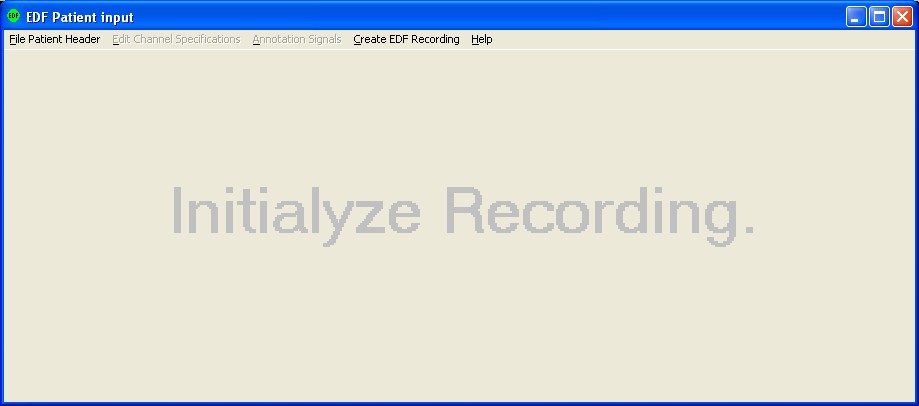
If the connection is stabilized an EDF-recording can be setup. Before starting the recoding, first the patient information and the recording time must be specify. Select the 'EDF'-item of the 'File' menu item ant than the 'Create patient header' item of the menu. |
 |
Now the Patient input dialog is visible. In this description a pre-defined patient is used. So we select from the 'File Patient Header' menu item the option 'Load Patient' In the case a new patient record needs to be define, select the menu item 'New Patient' |
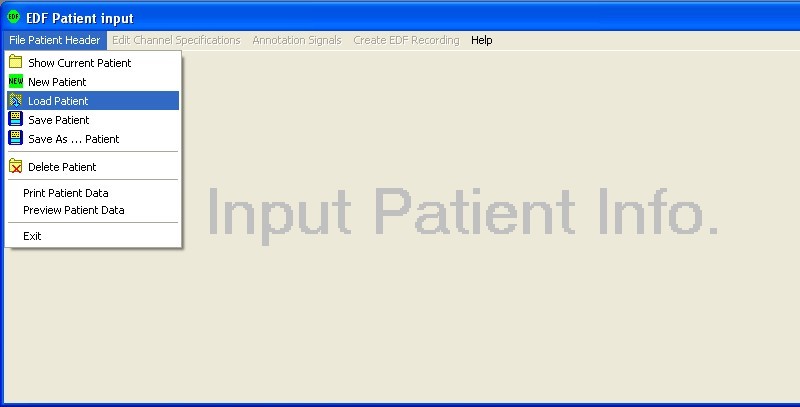
The Patient header data is stored in a special sub-directory at the installation location of the EEG-Monitor program. This sub-directory name is EDF_Patient_Database. Select the filename 'Haagse Harry.hdr' from the file list or a other name of an own made patient data record. |
 |
Now the Patient main input dialog is visible. On this screen two important field are visible ( yellow colored) The Patient ID and the Recording ID. The format of these two fields are very important. This format needs to be correct otherwise the EDF data viewer will generate a error. To be sure the format is correct a wizard is designed for these two field. The wizard will start by clicking then |
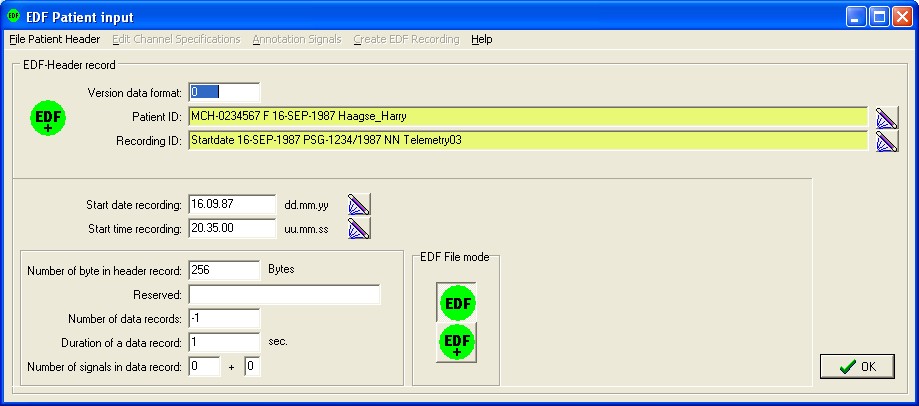
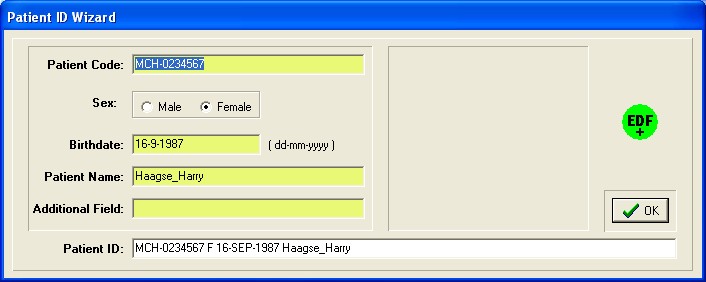
The Patient ID Wizard split up the Patient ID field in separate fields so the user can simply fill-in the data and the wizard can check the new data. At the bottom of the wizard dialog the assembly of the separate fields is shown in one line. After pressing the OK button the data of the Patient ID Wizard is copy to the Patient main dialog. |
 |
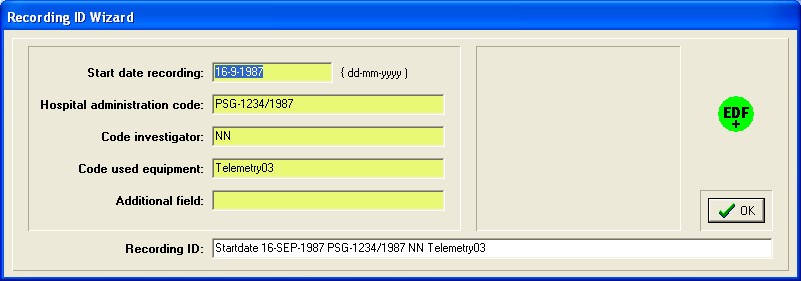
| The same story for the Recording ID. The Recording ID Wizard split up the Recording ID field in separate fields so the user can simply fill-in the data and the wizard can check field by field the new data. At the bottom of the wizard dialog the assembly of the separate fields is shown in one line. After pressing the OK button the data of the Recording ID Wizard is copy to the Patient main dialog. |
 |
The main dialog for Patient input contains two other wizard buttons. This Wizard buttons can used to fill-in the recording time and the recording date. In the middle of the dialog also two buttons are found with the text EDF and EDF+. By default the EDF-button is pressed. If the test recording needs annotations (Flash, DiGi-In or events) the EDF+ recording format must be selected. After all the fields are fill-in the OK button can pressed and the EDF-channel configuration can be defined. |
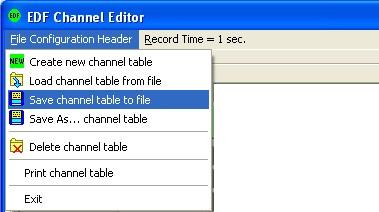
Channel specification.
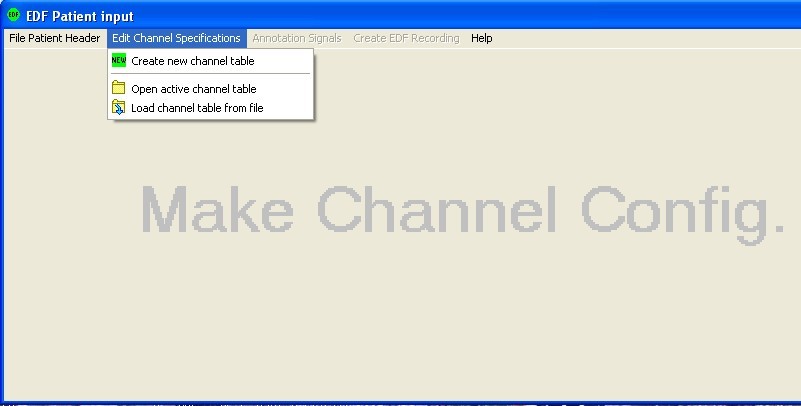
Before the EDF-recording can start first a channel selection must be defined. We use for this the EDF channel Editor. In this example a new channel selection is made. |
 |
The tool used to the type of amplifier and do a pre-selection for the signal names and transductors. For every channel a line is shown in the list. At the start no channels are selected. With the check box the channel can be activate in the EDF-configuration. Depending of the record time and the main sample rate of the amplifier a max. number of channels can be selected. The tool checks on this max. number of channels. |
|
 |
|
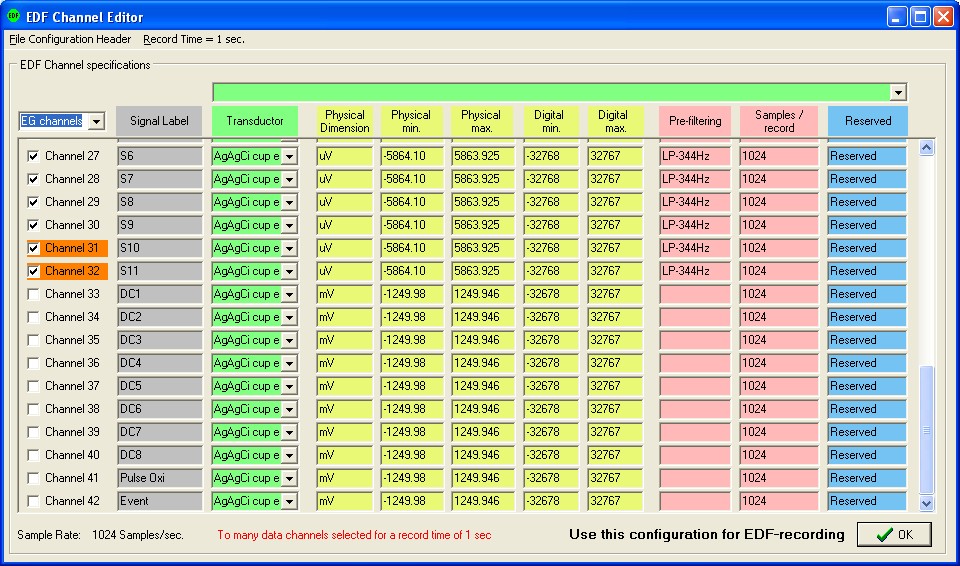
If there are to many channels selected in the configuration the highest channels that are not fit are colored orange. At the bottom of the dialog a extra error text is printed. The maximum number of permitted channels is depending of the main sample rate of the amplifier and the selected record time. The size of an EDF-record has a maximum of 61440 bytes. A data sample of one channel of the amplifier is two bytes. The max. number of samples is 61440 / 2 = 30720 samples. For a main sample rate of 1024 sample/second of the amplifier the max. number of channels is 30720 / 1024 = 30 channels. If more channels are needed the main sample rate of the amplifier must be lower. A other solution is to select a record time shorter than 1 second. For this option it is needed to select the EDF+ format. By this format it is possible to use a shorter record time of 1 sec. |
|
 |
|
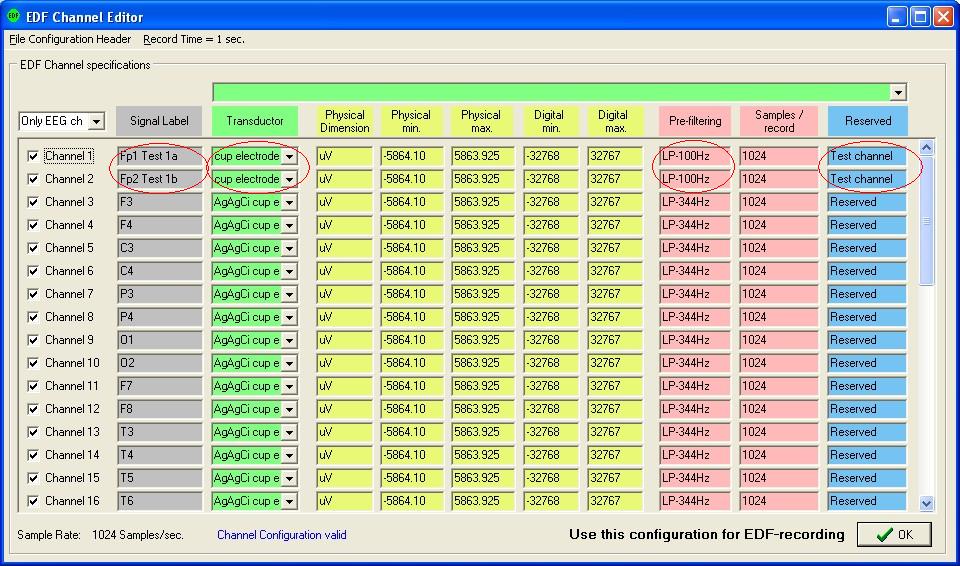
For each channel the next parameters can be changed by typing or selecting the specific field.
The picture below illustrate the changes that are made in the channels 1 and 2. |
 |
|
Define Annotation Signals.
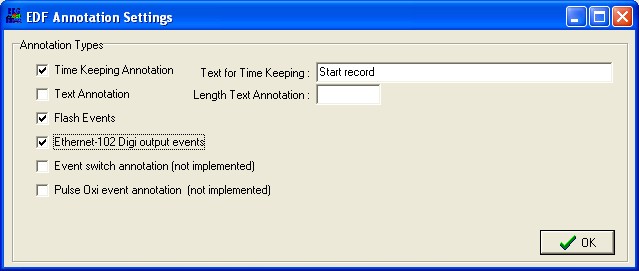
| When the EDF+ recording format is chosen an extra main menu item is selectable. ('Annotation Signals') In EDF+ format it is possible to add events to the EDF-recording. Also it is possible to select a record time below 1 second. So more channels can be stored than. |
 |
|
 |
Create EDF Recording.
| Now all the settings ar ready for a EDF registration. Select the menu item 'Create EDF recording' The program ask for a file name to store the EDF-data to. |
|
 |
|
For all programs and source code:
© 2008 by BRAINTRONICS. All rights reserved.
Disclaimer:
|
|
THE PROGRAM AND ANY SUPPORT IS PROVIDED BY BRAINTRONICS "AS IS" WITHOUT WARRANTY OR CONDITION OF ANY KIND EITHER EXPRESS, IMPLIED, OR STATUTORY, INCLUDING, BUT NOT LIMITED TO, ANY IMPLIED WARRANTIES OR CONDITIONS OF MERCHANTABILITY, FITNESS FOR A PARTICULAR PURPOSE AND/OR NON-INFRINGEMENT. THE ENTIRE RISK ARISING OUT OF THE USE OR PERFORMANCE OF THE PROGRAM AND SUPPORT REMAINS WITH YOU. IN NO EVENT WILL BRAINTRONICS BE LIABLE FOR ANY LOST PROFITS, LOST SAVINGS, LOST REVENUE, LOST DATA OR FOR ANY DIRECT, INDIRECT, INCIDENTAL OR CONSEQUENTIAL DAMAGES, EVEN IF BRAINTRONICS HAVE BEEN ADVISED OF THE POSSIBILITY OF SUCH LOSSES OR DAMAGES. IN ADDITION BRAINTRONICS WILL NOT BE LIABLE FOR ANY DAMAGES CLAIMED BY YOU BASED ON ANY THIRD PARTY CLAIM. |